Towel Rail Hardwire Kit Installation Guide
Safety and Preparation
Important Safety Information
- Warning: Turn off power at the circuit breaker before starting any electrical work.
- Caution: Always wear protective gloves and eyewear when cutting or drilling to avoid injury.
- Note: Electrical installation must comply with local regulations. If you are not qualified, consult a licensed electrician.
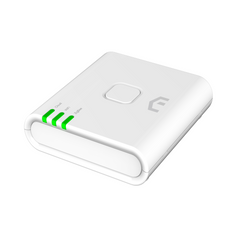
Step 1: Prepare the Hardwire Kit Location
-
Plan the Mounting Position
- Measure and mark the wall where you will install the 2-gang faceplate.
- Follow local regulations regarding minimum heights from the floor, especially in bathrooms or wet areas (commonly 300 mm from the floor).
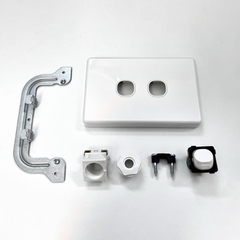
- Assemble the faceplate: place the switch in one opening and the gland in the adjacent opening.
-
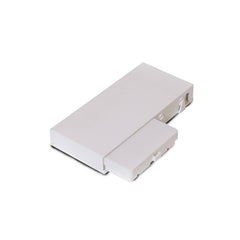
Cut the Opening in the Wall
-
Use a saw or appropriate cutting tool to create an opening that fits the wall bracket of the hardwire kit.
-
Caution: Wear protective gloves and eyewear while cutting to prevent injury.
-
Example Image:


-
-
Feed Wires Through the Gland
- Locate the incoming electrical supply wire within the wall.
- Feed the towel rail wire through the gland so that all connections can be made either in the switch terminals or behind the faceplate.
Step 2: Towel Rail Wiring
-
Strip the Wires
- Use a wire stripping tool to carefully remove the insulation from the brown and blue wires on the towel rail cable.
- Tip: Avoid nicking or damaging the copper conductors.
-
Reference Video:
-
- Reference Photo:

- Brown (Active)
- Blue (Neutral)
- Black (Thermostat wire—Not used): Must be terminated in an isolated connector. Do not earth this wire.
-
Connect the Hardwire Kit to the Supply and Towel Rail
- Isolate the Black Wire: Cap or tape the black wire to prevent electrical contact.
- Connect the Active (Supply) to the Switch Common: The red supply wire goes to the switch common terminal.
- Connect the Towel Rail Active (Brown) to the Switched #1 Terminal.
- Connect Neutral Wires (Blue from Towel Rail and Black from Supply) Together: Join them in a looping terminal or a separate connector.
- Reference Video:
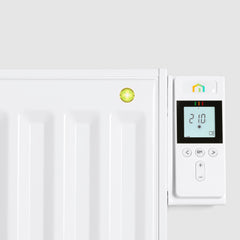
Step 3: Bracket and Mount the Hardwire Kit
-
Secure the Faceplate
- With all wiring connections made, mount the faceplate to the wall.
- Tighten the gland screws to set an appropriate cord length for the towel rail.
-
Example Image:

- Reference Videos:
Step 4: Final Check
-
Inspect Wiring
- Ensure all connections are tight and the wires are properly seated in their terminals.
- Confirm that the black (thermostat) wire is isolated.
-
Mounting Security
- Verify the faceplate is securely attached to the wall with no gaps or loose screws.
-
Clean Up
- Remove any debris or dust created during installation.
- Tip: Use a soft brush or cloth to avoid scratching finished surfaces.
-
Restore Power
- Turn power back on at the circuit breaker.
- Switch the towel rail on and check for proper operation.